
The moment you’ve all been waiting for THE BATHROOM RENOVATION REVEAL is finally here!! WOO HOO. We won’t talk about how long it’s taken lol I’m living proof that renovations are nothing like what you see on TV. Especially when you’re doing it yourself, and you have the luxury of a second bathroom. I truly believe that when you want to do something right, it takes time and renovations are no different. It takes time to source the perfect items, not to mention decide on what you want, and then of course all the work that goes into it.
We completely gutted our bathroom, we knocked down 3 walls all the way down to their studs to create a bigger more functional guest washroom as well as add an additional stand up shower.
In addition to creating the additional space for the washroom, we also dissolved our laundry room/coat closet into one, and added another storage closet on the other side of the bathroom. Definitely not your average first renovation. We tackled a pretty large square footage (all while everyone of my friends decided to get married this summer tying up all our free weekends i.e prime time to renovate). Anyways it’s finally DONE and it’s beautiful I’m glad we took our time, and really thought through each step and because of that we absolutely love everything about this bathroom, and that’s all that matters. Where there’s a will there’s a way, and I’m just so happy to be on the other side of the renovation finally.
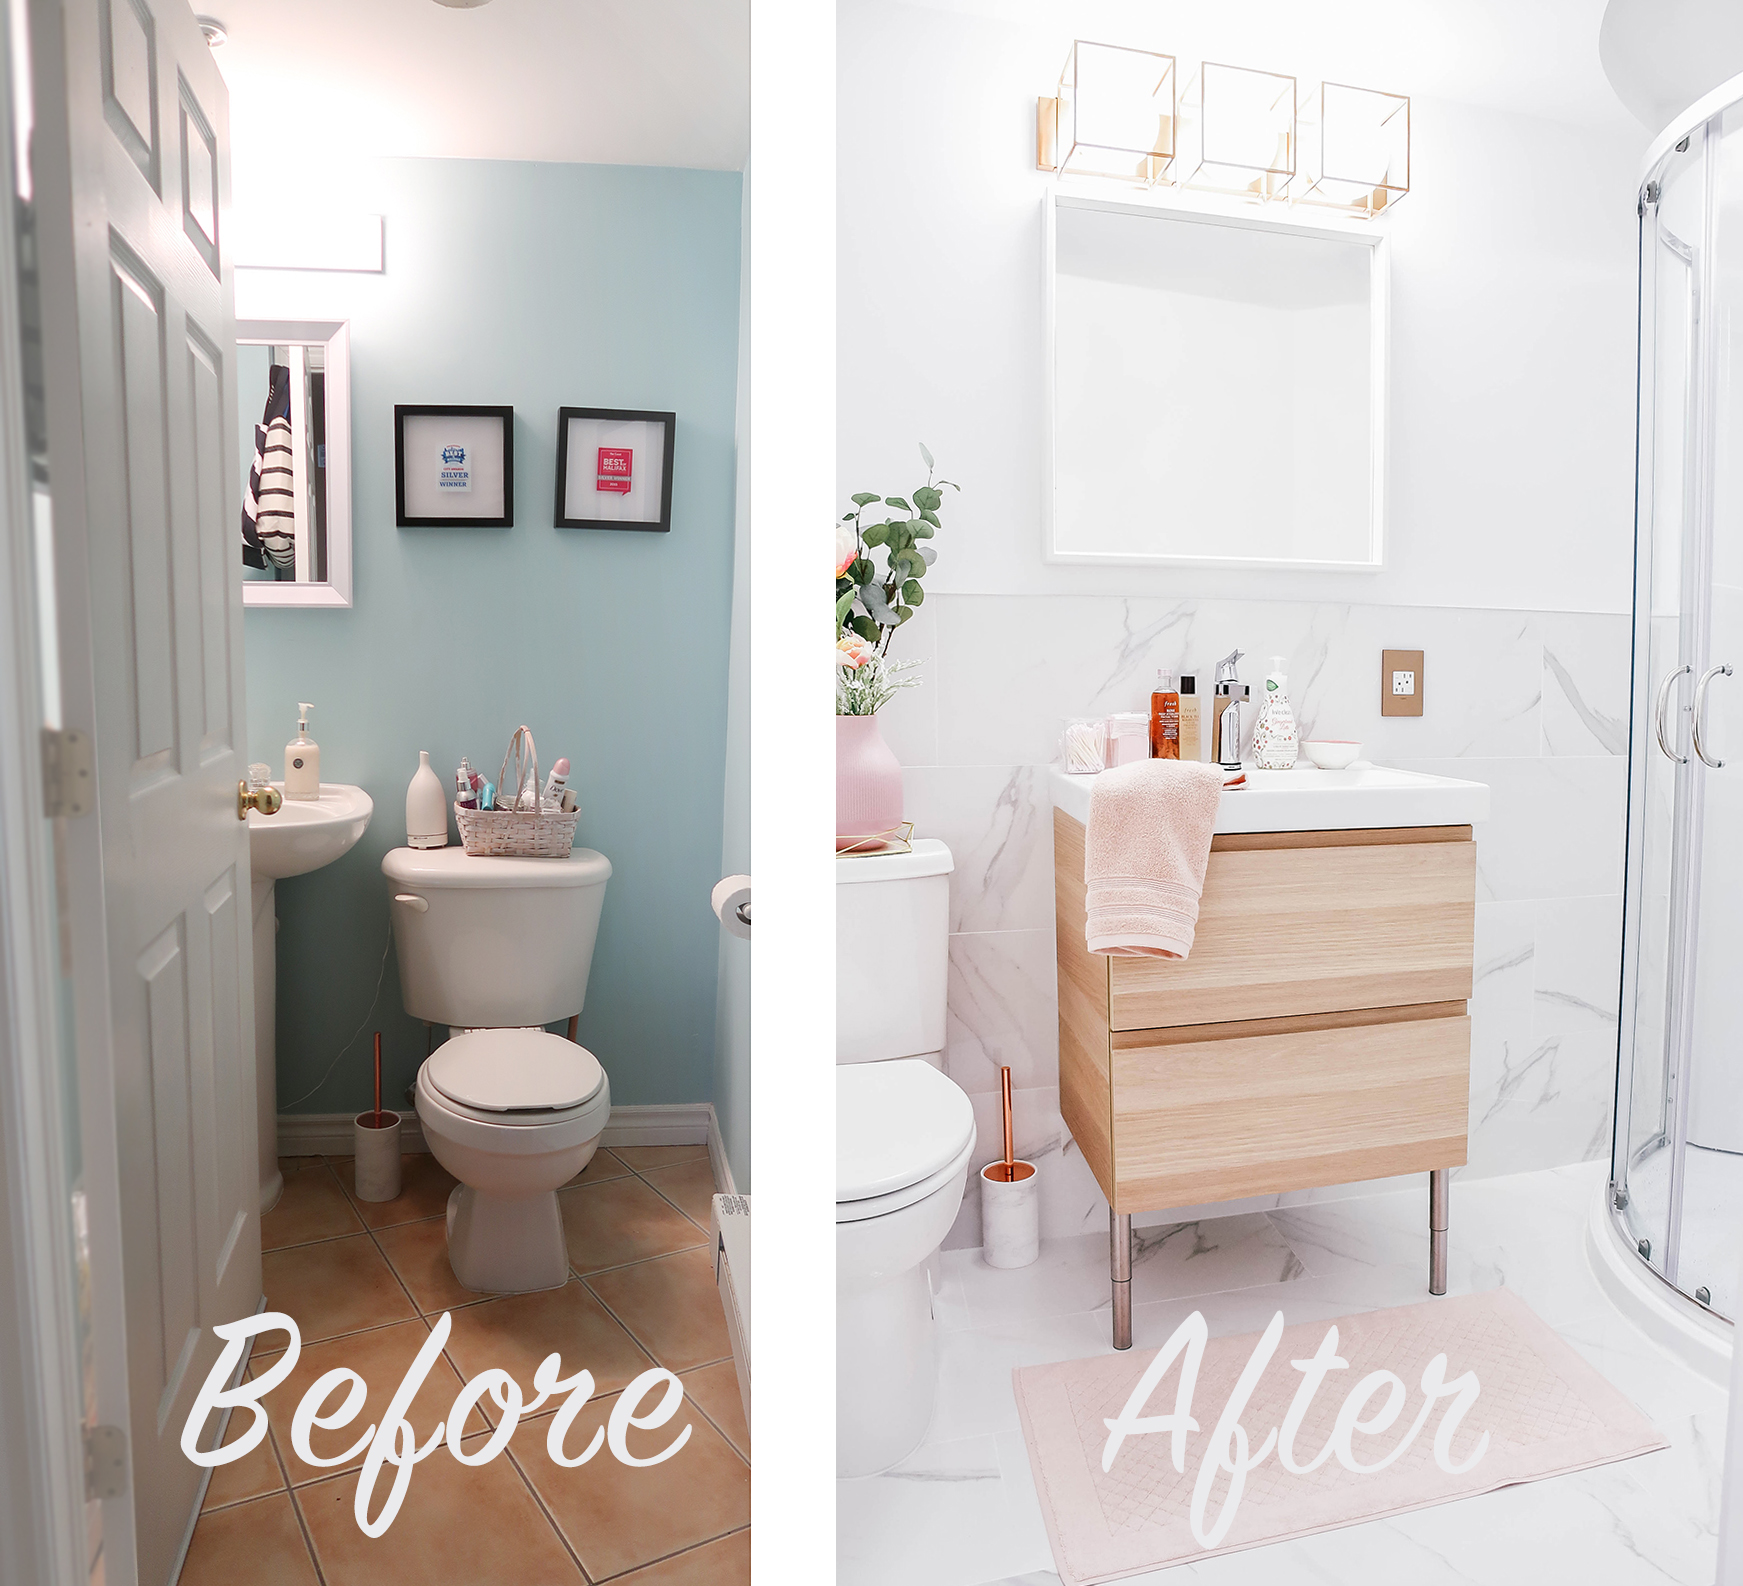
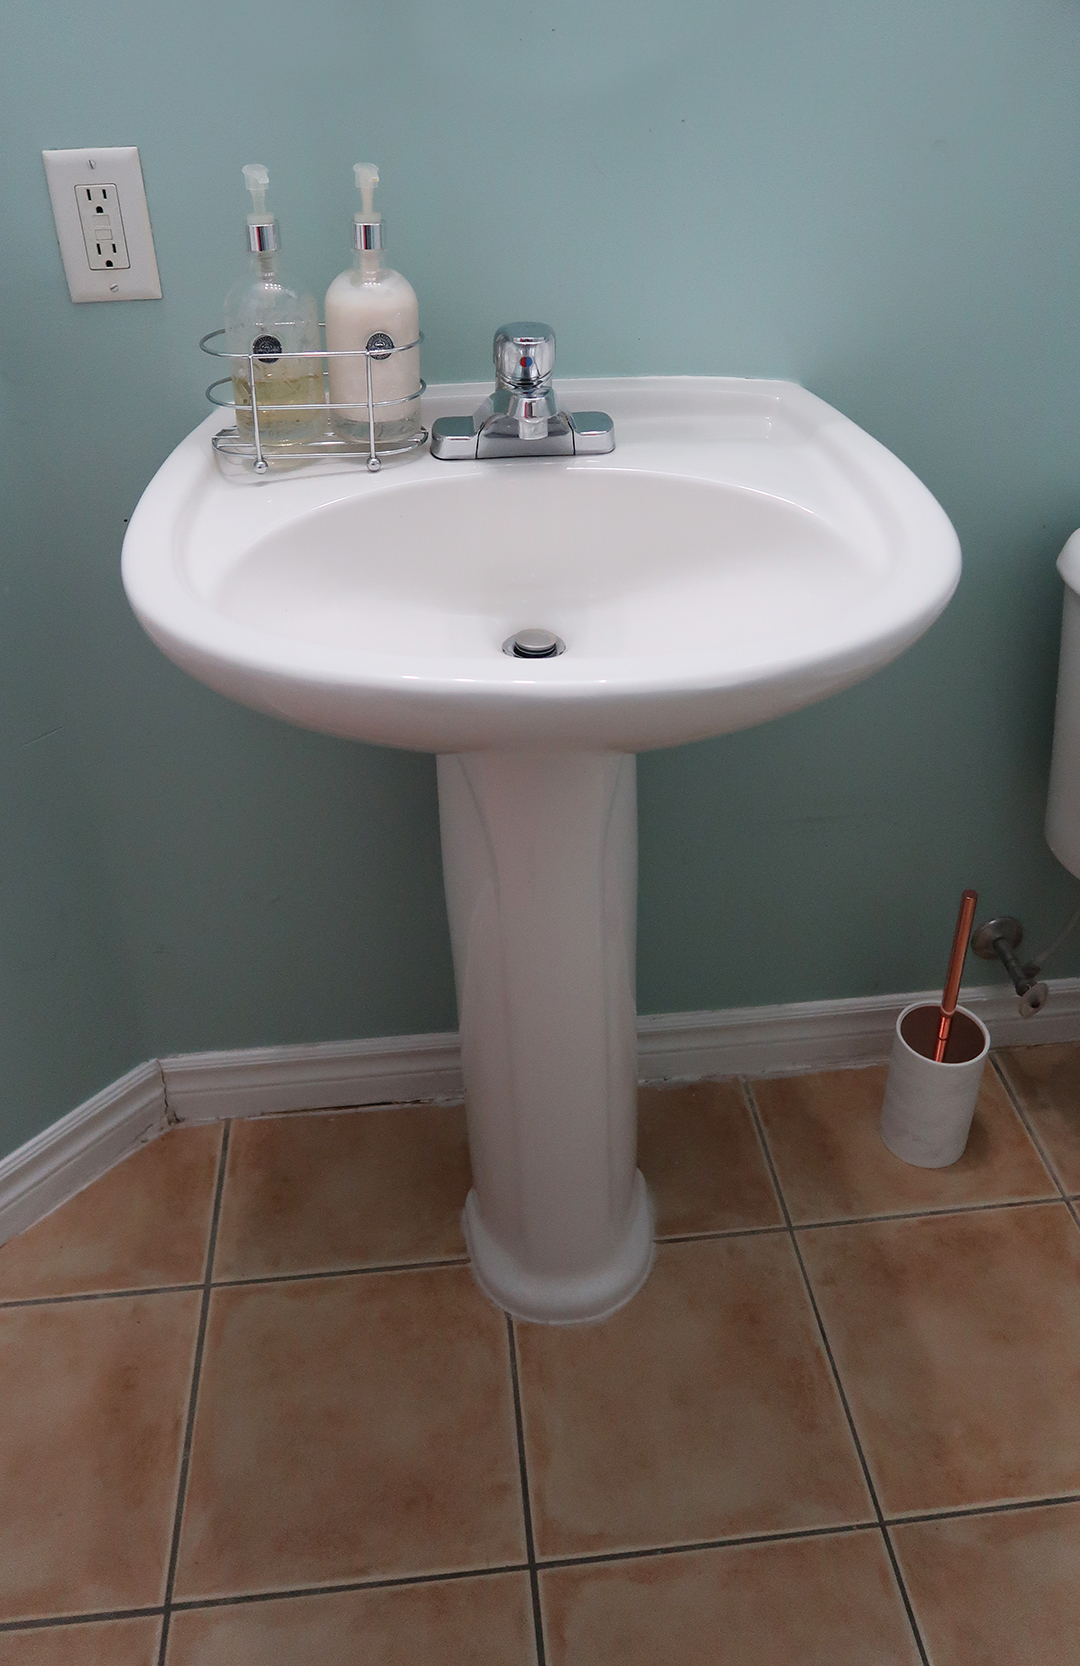
Before we get into all the amazingness that is our new bathroom let’s just take a quick peek down memory lane okay because boy did we have a mountain to climb. Our condo has never been renovated and the layout just didn’t make any sense. Our previous bathroom was so small I hardly could photograph it. Our bathroom door opened inward, and you had to straddle the toilet to exit it. Our guests were forever getting stuck in the bathroom every time they visited never mind if they’d had a few cocktails. While it was pretty funny it was not the best layout, and we also wanted to add a stand up shower to our teeny water closet a big job no less.
Borrowing space from the neighboring laundry room we utilized some majorly wasted space, we also changed the entry, and will attach a door that opens outward to maximise the space inside the bathroom. And guys I’m just SOOOOOO happy everything makes more sense now.
I mean I might be biased, but I feel like my bathroom belongs in a magazine now AND I’M SO PUMPED. I really feel like this washroom really reflects us and our style, and hello the 21st century. If you want a more in-depth look at everything and the items we chose definitely watch the reno reveal video and catch all the details below.
SEE THE FULL TRANSFORMATION IN THE VIDEO BELOW
Because I know ya’ll will ask I’m including all the items we chose for our bathroom reno. Thank you to everyone on Instagram for following along and weighing in throughout the process. You have no idea how much you all help me. I’m forever grateful.
FLOORING
Casaroma “SUPER WHITE MARBLES” tiles + install: c/o Wacky’s Flooring Warehouse.
I MEAN!!! I don’t want to brag but wow right??? It’s been quite the transformation. We gutted three rooms, added a shower, rearranged all the plumbing it’s been a rough go lol I say we but really I didn’t do too much in the way of labour Travis, and his dad did most of it. We only enlisted some professionals for the flooring, plumbing, and some wiring stuff, but otherwise round of applause to Travis and his dad because they KILLED IT.
Okay so we have to talk about these tiles right?? I LOVE THEM SO MUCH. It couldn’t be more perfect and it couldn’t be more Me. Anyone who knows me knows I am marble obsessed, and now thanks to the team at Wacky’s Flooring Warehouse for making this a reality. Did you know they had two locations?? What I love about the warehouse is that they offer some amazingly beautiful and trendy materials, but they are affordable. The team at Wacky’s have been in the biz for a long time, and it shows. They were so helpful while we were deciding on materials (which can be VERY overwhleming) they asked all the right questions so we could make the best choice.
For the tiles we chose the Casaroma “Super White Marble” tiles and opted to have them installed by Wacky’s. There are some thing you do yourself and there are some things you leave to the professionals. I think when it comes to finishing things if you can afford it, it’s definitely best to leave to the professionals. I think if it was a smaller space, and not our guest bathroom we might have tackled it, but also when it comes to renovations you basically use every spare minute you have, and lose all your weeks, and let’s not forget you’re still working full time hours it get exhausting, and sometimes you just need a break lol. Having Wacky’s come in to do the tiles really saved us from making rookie mistakes, and it really gave us the professional finish we were looking for.
I’m so happy with the work they did on our bathroom I can’t wait to work with them again when we do the kitchen. If you have any questions about the materials used or you’re looking for a quote do not hesitate to reach out to Wacky’s Flooring, give them a call or even message Wacky’s directly on Instagram they are so responsive I’m sure they’d be happy to assist you.
Faucet, Shower Head, and valve c/o Delta Faucet.
First let’s chat about this stunning faucet, I like to think of faucets the same way I think about accessories with an outfit. It’s a really great opportunity to add some personality into a space, and we couldn’t be more impressed with our Zura Single Handle Lavatory Faucet. I mean touch technology?? How cool it that?? The Touch20 Technology allows you to wash your hands without touching the tap, and for this self proclaimed germophobe that’s as close to heaven as you’re going to get in a washroom.
It’s so easy to keep clean, and it was really straight forward to install you can totally do this yourself, so no need to call someone in.
To learn more about the Zura Faucet from Delta, visit their website or click here.

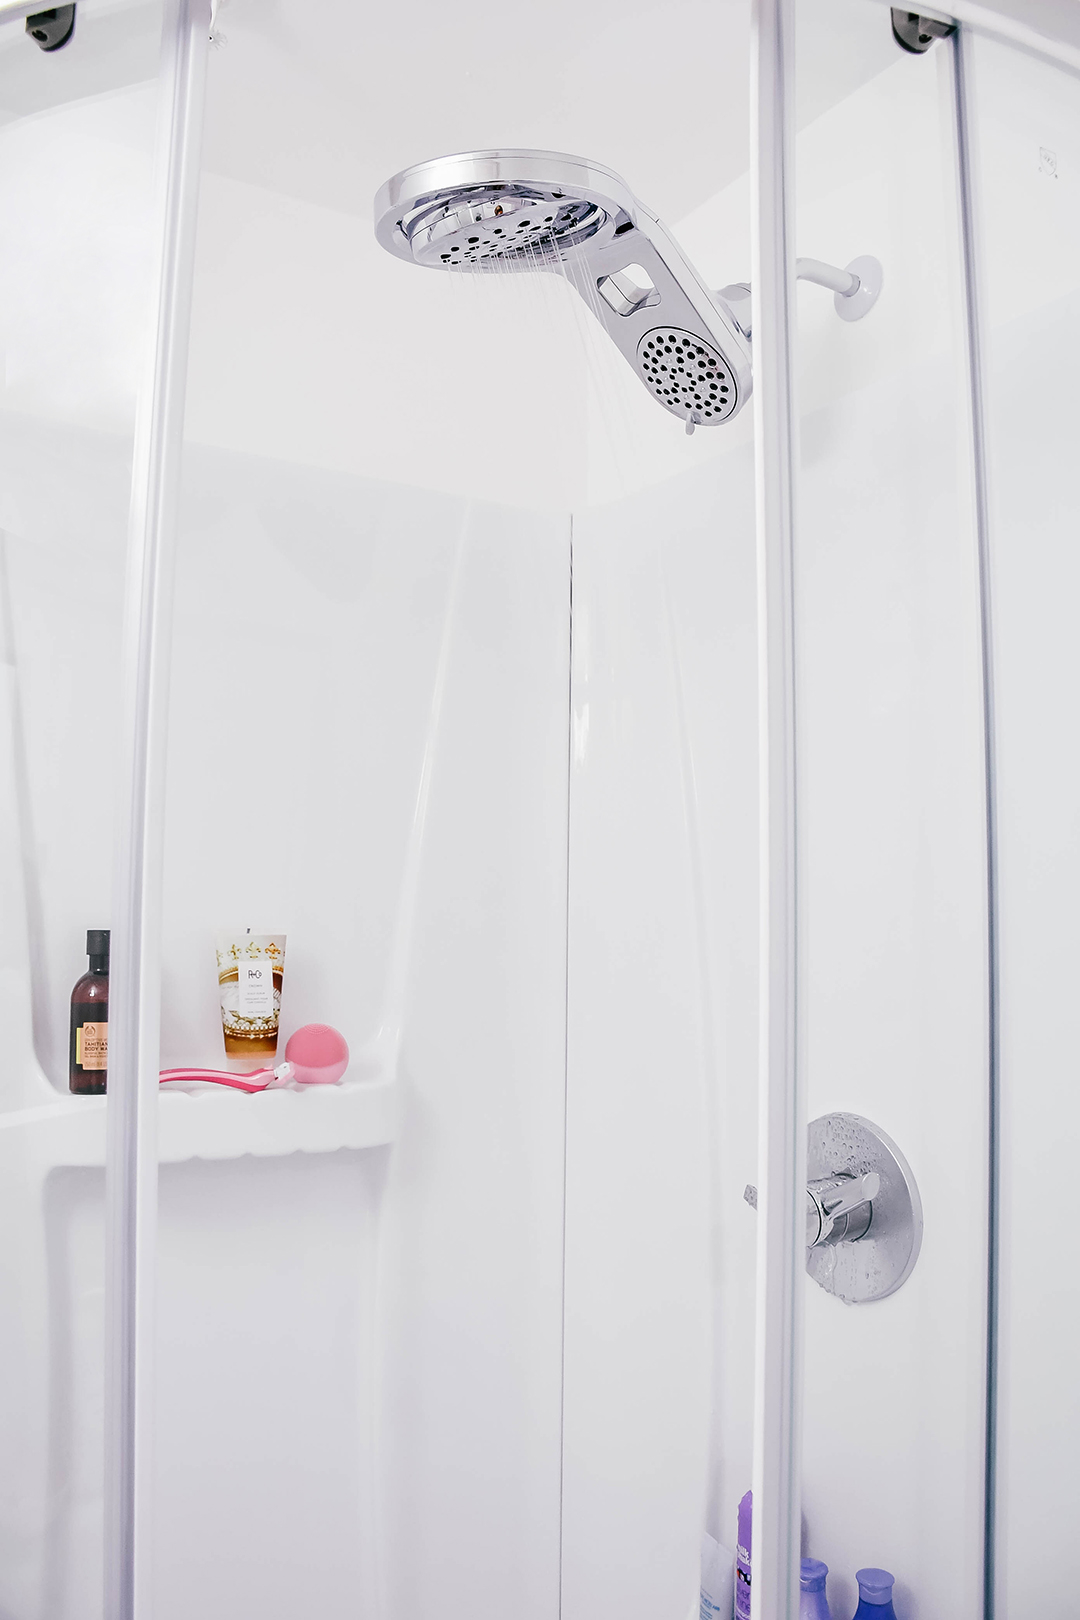
In addition to the faucet our shower head is also from Delta, we opted for the Hydrorain Shower Head, can I just say it’s glorious. I am obsessed with this shower head, I love the various settings (there are 7), and that the water comes from above and behind, I love that the top part tilts effortlessly. It’s really great for those who live with tall people like me, and are always adjusting it.
While I love the experience and all the different settings I am obsessed with how well it cleans my hair. I have long hair and I do exercise and use dry shampoo/ hairspray quite a bit, so it can be really difficult to get a good clean when washing my hair.
After using the Hydrorain Shower Head my hair has never looked better, and it takes a lot less effort. I’m not sure I’ll be using my other shower ever again.

In addition to the shower head, and faucet we also opted for a Delta Valve, what I love about the valve is that it’s a) beautiful like all their products, but b) protects you from burning yourself. I don’t know about you but I can never seam to get the temperature right, and it’s always too hot or too cold, well now you don’t need to worry the Delta Valve does the hard work for you! Find the links below for all the parts we needed for our shower (granted we were starting from scratch remember).
LIGHTING:
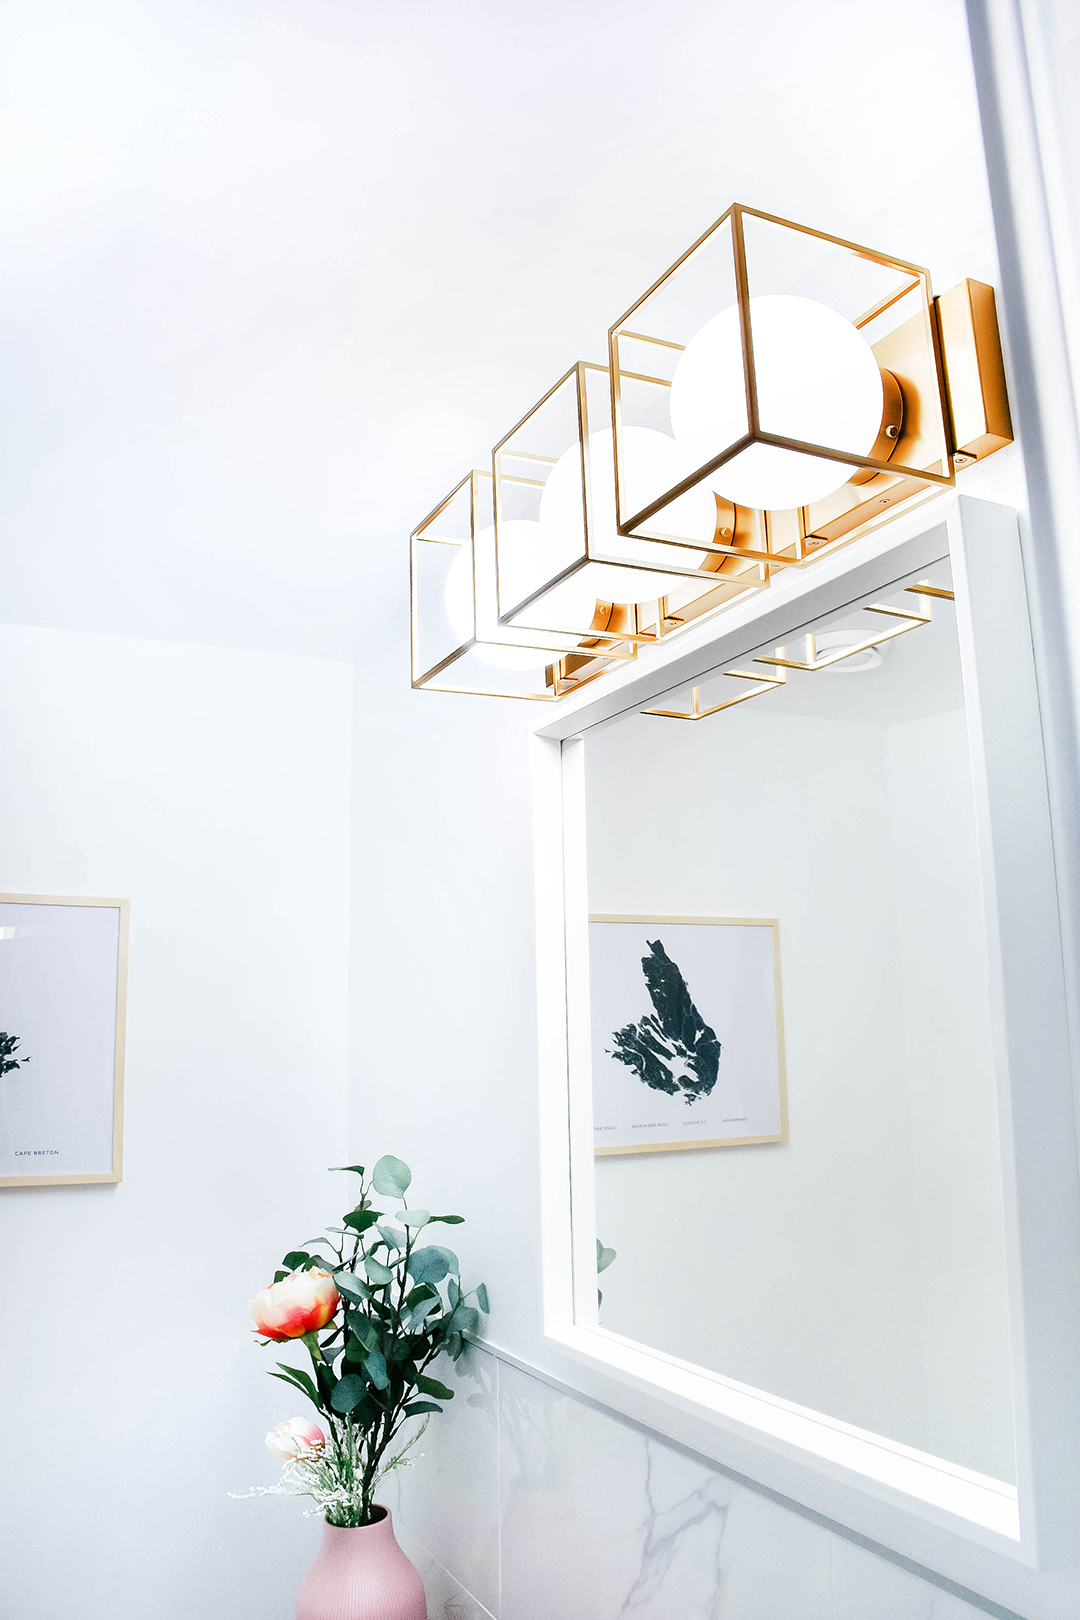
Matteo Light Fixture: c/o Living Lighting At Station 12 Dartmouth
I really need to thank my friend Nicole for this one because she really nudged me in the right direction (thanks babe). I’d shown a bunch of options from my fave lighting store Living Lighting on Instagram and I while I did really love this fixture it really wasn’t on my radar. Nicole messaged me on insta and insisted I needed this light, and immediately I knew she was so right. It’s so beautiful, and I’m so happy we decided to go with it because it really does bring a lot of personality to the space. I’m so so happy, thank you Nicole and thank you Living Lighting. The light fixture was pretty easy to install even if we measured the hole for the electrical wrong, and had to do some rejigging. It’s really tough when you’re doing a reno for the first and guessing where things are “going to go”. Thank goodness Travis problem solved it pretty quick because I know we’re going to love this light fixture for a long time to come. Geometric with a nod to art deco we couldn’t be happier.
The Matteo light fixture is also available in single, as well as double bulbs, and can be hung vertical as well as horizontal. For more information or for dimensions click here.
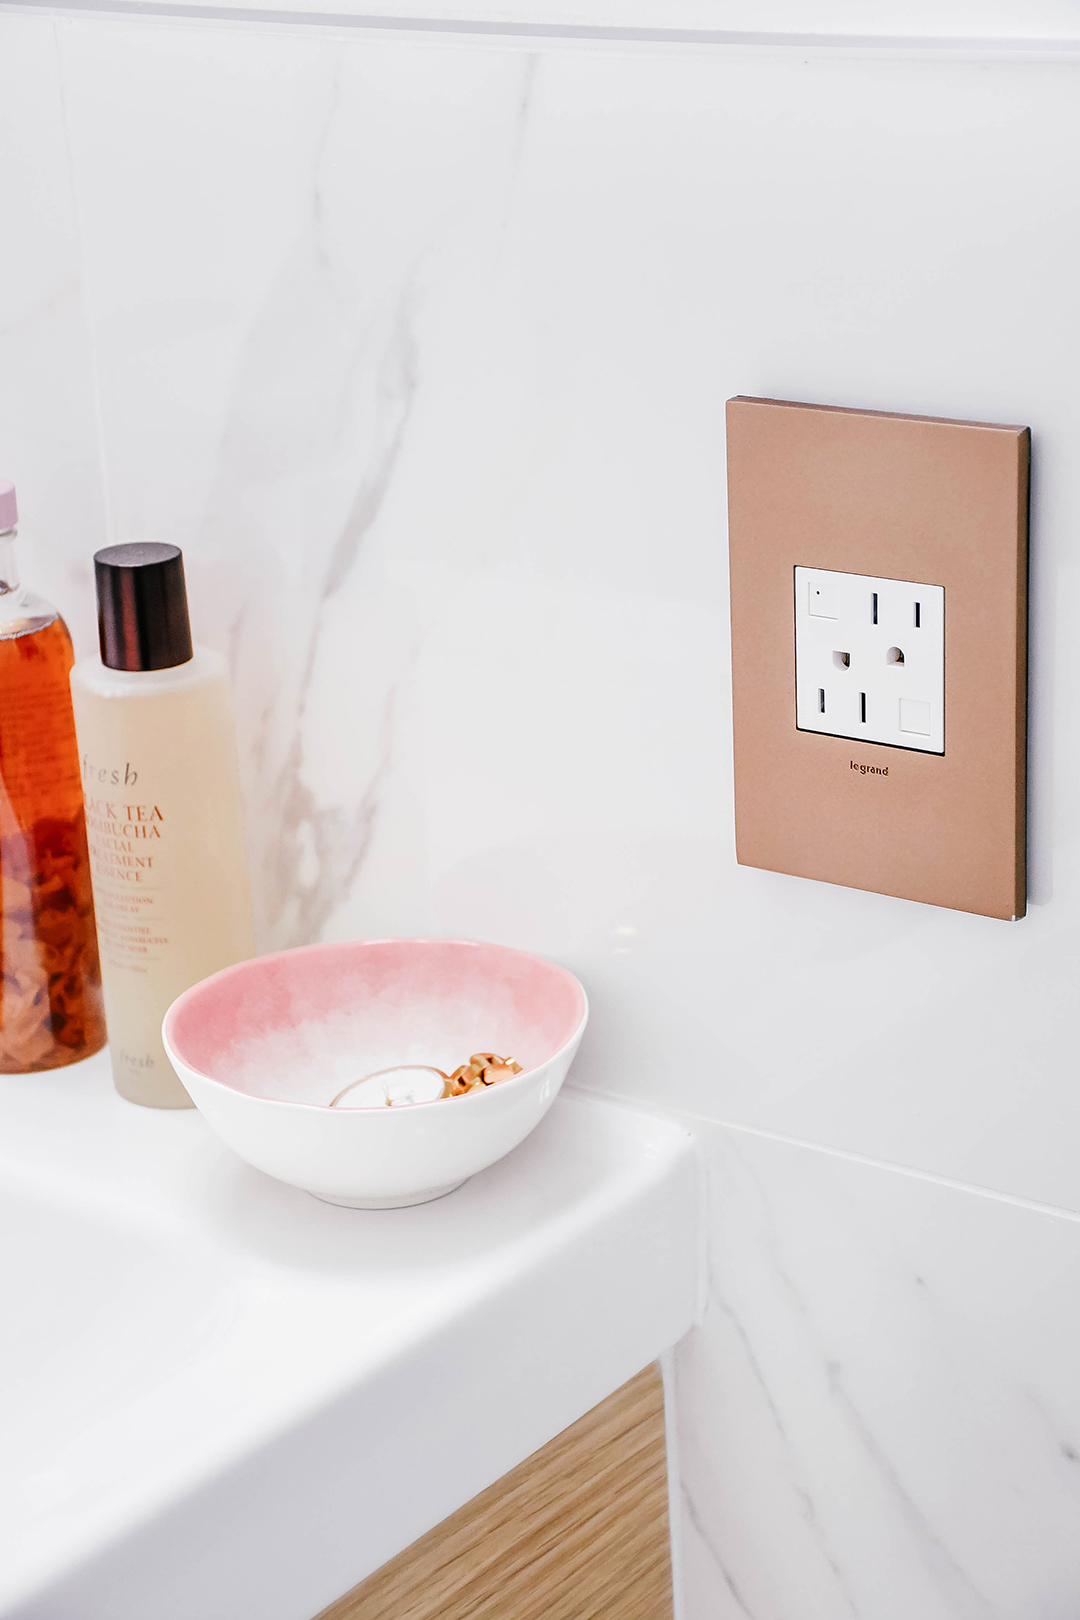
OUTLET PLATES:
Legrand Adorne Wall plates c/o Catalyst Electrics, available at Living Lighting at Station 12, and online here.
Knowing we needed an outlet near the vanity for hot tools, we really wanted it to be purposeful, and as pretty as everything else in our washroom. Having seen the Adorne Wall Plates on Instagram I knew it would be exactly what we were looking for. The Adorne wall plates make your regular eye sore outlets just so beautiful.
I love the modern design of these outlets, and wall plates from from Catalyst I really feel like it elevates the space.
For the outlet on the marble tile we chose the “Satin Bronze” adorn wall plate, as it was less of a yellow gold, and more bronze (which matched our light fixture). It can be tricky to know what colors and finishes will work best, I definitely suggest you pop over to Living Lighting and see them in person so you know for sure! 🙂
HOW IT WORKS: choose your outlet and/or light switch style then choose your corresponding wall plate. The wall plates come in a variety of finishes.
We also got some “glossy white” Adorne wall plates for additional outlets you’ll see those in the video, and we’re looking forward to updating the light switch outside the bathroom when we’re able to paint (i.e when we remove the tiles when we renovate the kitchen gotta love an open concept). One thing you’ll learn when you do renovations is that there’s definitely an order of operations for everything, and unfortunately it isn’t always how you want it to go.
VANITY BEFORE
VANITY AFTER

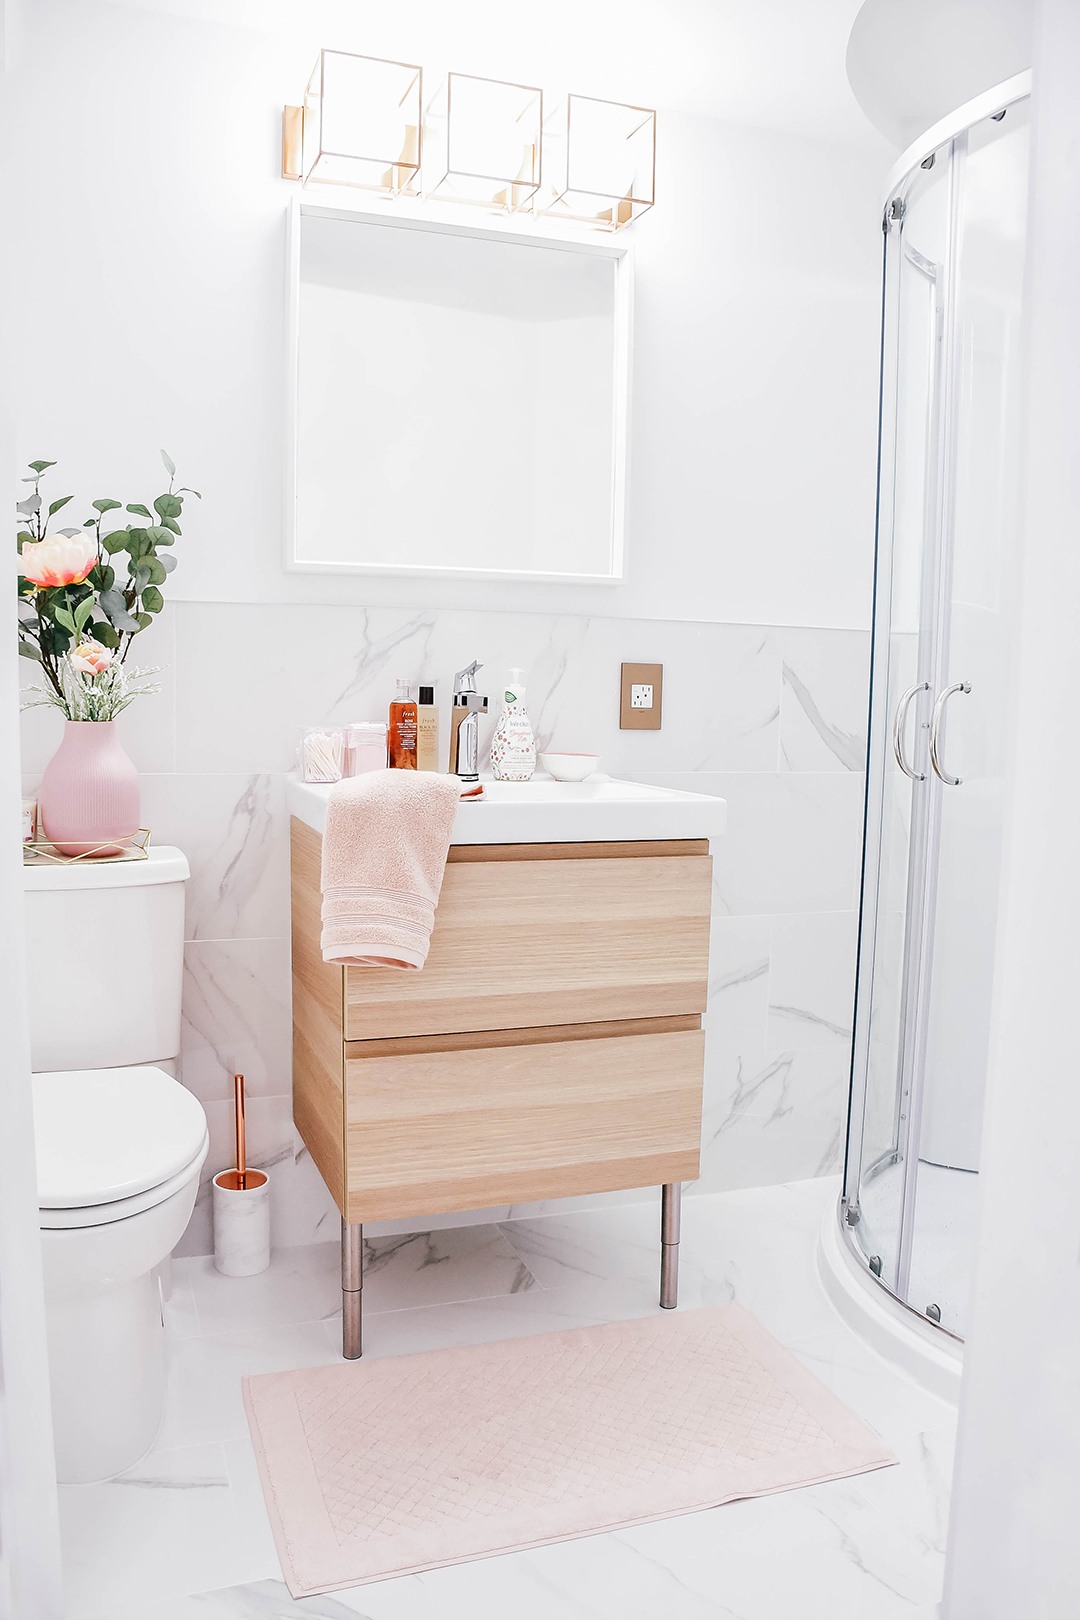
Vanity & Sink + Mirror: Ikea
I’m so SO happy with our vanity, it took us so long to find the right piece, but ultimately I think we made the right call going with wood and something a little warmer. With the tiles, and all the white we needed a little punch of nature so it wouldn’t feel so cold. We went with the Oak GODMORGON Vanity + ODENSVIK sink (each sold separately and come in an array of finishes) we bought ours on clearance for like $70 which was an amazing find, but you can still shop similar styles here. Because our tiles had to come up a bit higher to accommodate the outlet (necessary for hot tools) we needed something pretty narrow, but also wide enough to be flush with the vanity (look at me using the lingo?? Am I an experienced renovator now or what??).
For our mirror we really lucked out with the NISSEDAL mirror also from Ikea, as it was only $30. We initially wanted round (#trending), but we couldn’t find anything to fit the space, and I actually like how this one from Ikea maximizes the space and is kind of seamless with the walls so the light fixture and the vanity are the focal point. This mirror also comes in black and looks very chic definitely would be great in another space.
Toilet Cleaner Brush + Garbage Can: President’s Choice at the Joe Howe Superstore. Bath Mat & Bamboo Towels (they are so soft): Sourced via Mumford Winners.
UBERHAUS Shower, via Rona.
Toilet: American Standard via Home Depot (similar).
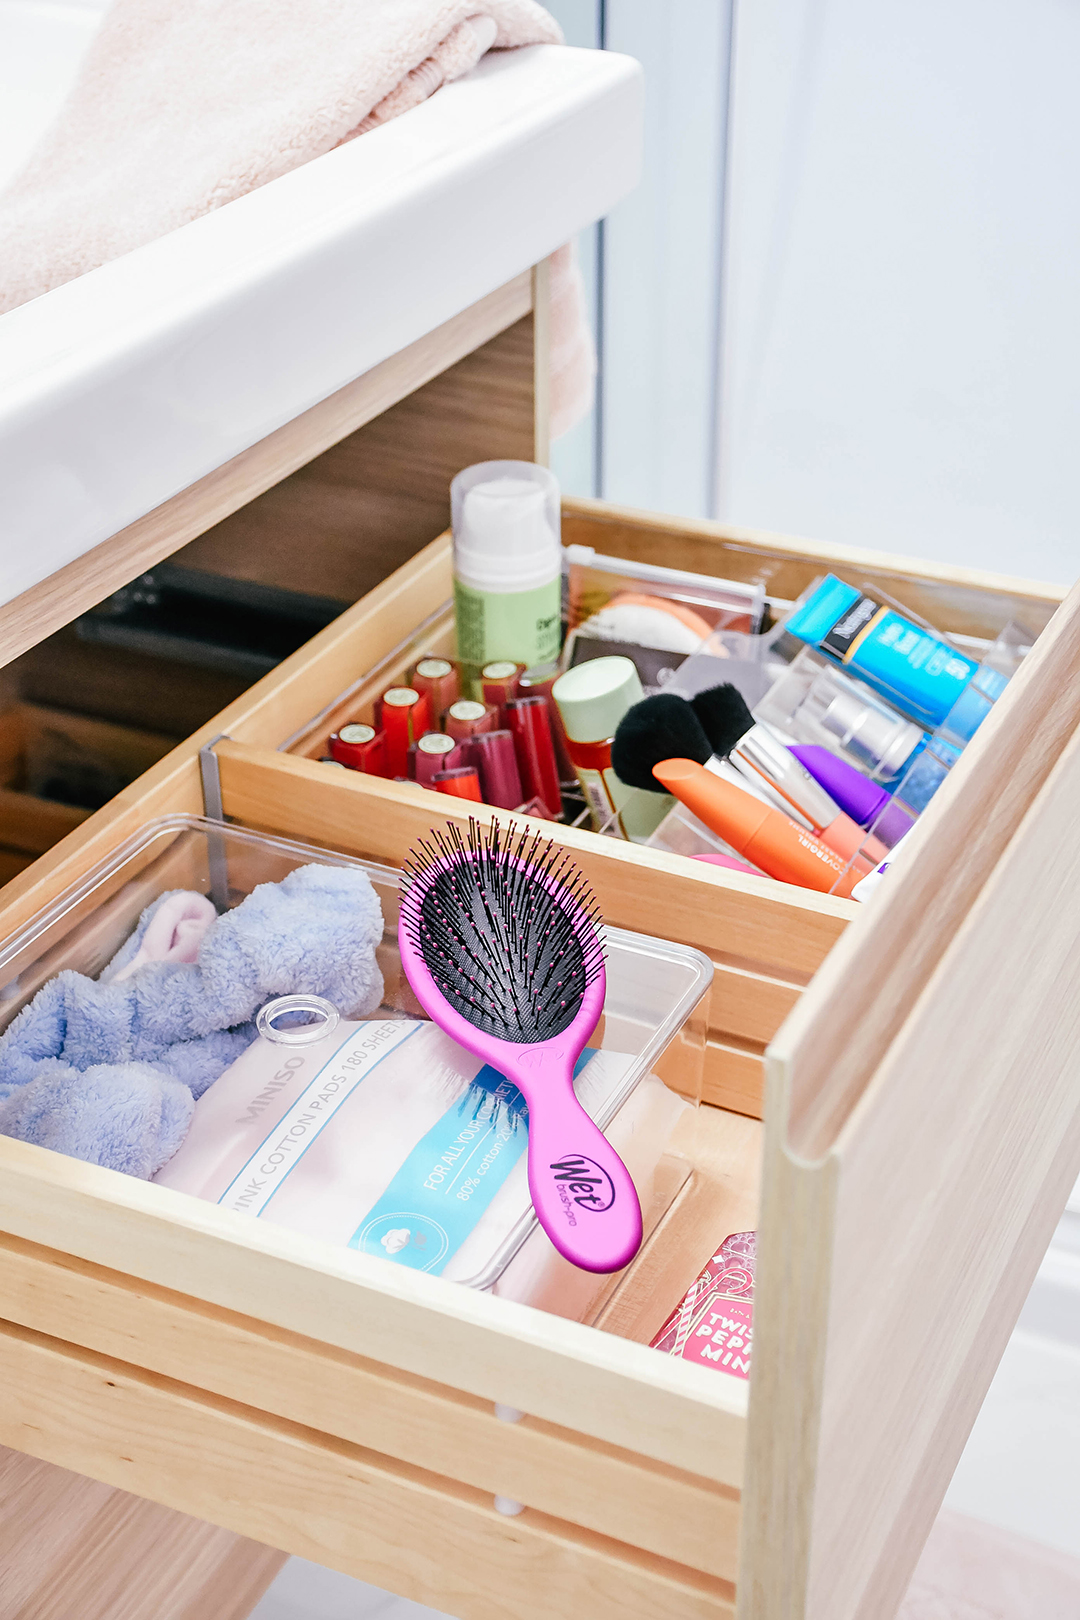
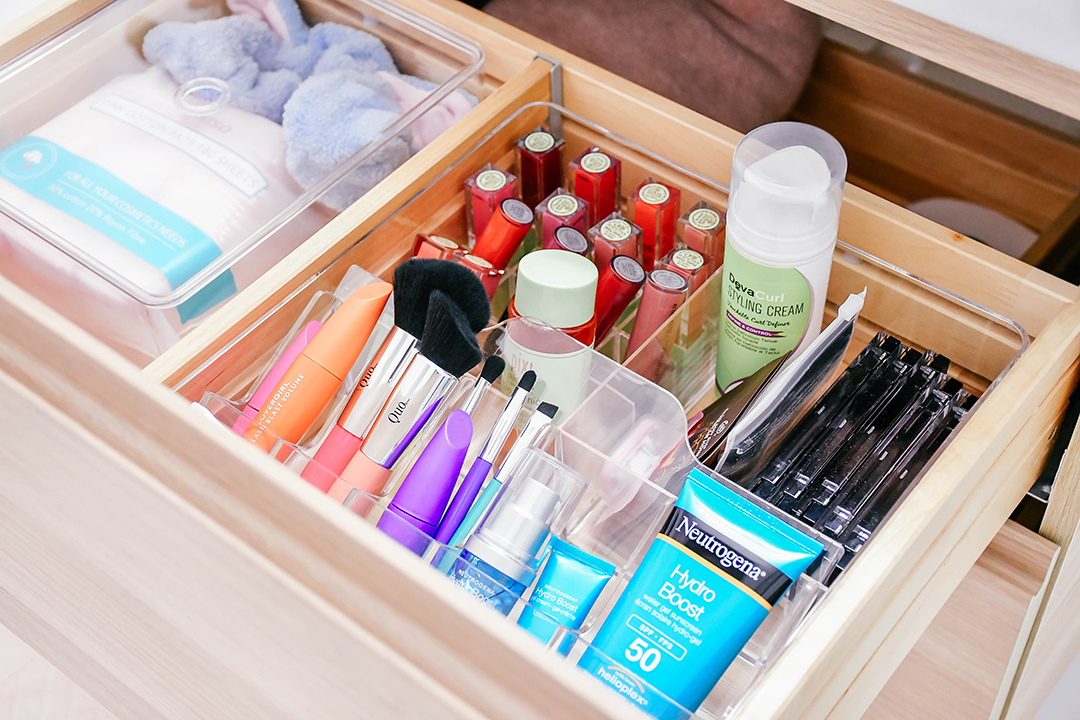
I mean does this organization sooth your soul or what? I also picked up the GODMORGON BOX clear acrylic vanity organizers from Ikea as well, and I love them so so much. I love how they are clear and minimal and fit perfectly in our vanity, but also that all this mess is neatly tucked inside the vanity. OBSESSED!
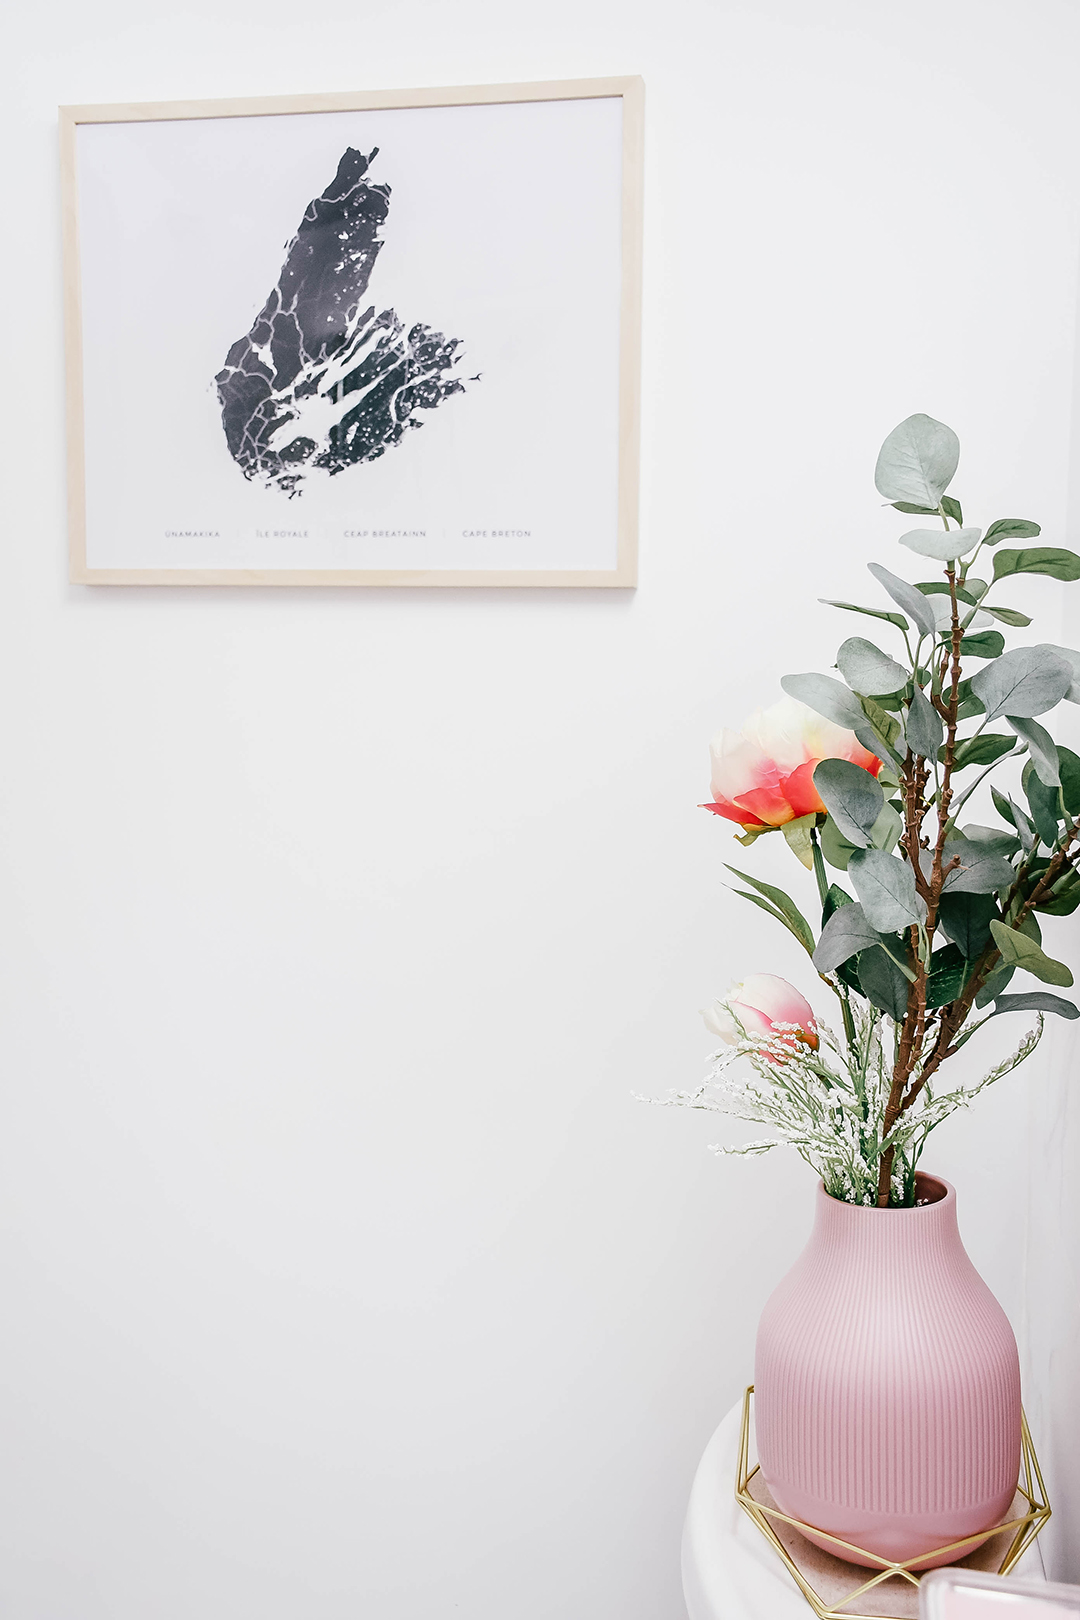
Cape Breton Print c/o Salt Wreck
We really struggled with what to put on the walls, it’s kind of funny of the lipstick and mascara of space can be the trickiest. You’ve worked so hard to create the space you want to represent and dress it well. I’ve I’m being honest I totally forgot I had this print until Travis reminded me. Originally I thought it was a vertical print, so I planned on placing it over the toilet and next to the mirror, but we both had to laugh when we took it out of the packaging and it was horizontal. OOPS! Oh well we actually really like it on this wall, and we needed something there anyways. It’s really special to us because we’re both from Cape Breton (and our families still live there) even though we met here in Halifax. I kind of love that it’s something that we both have in common, and it’s a really beautiful print I was really happy with the texture and quality.
Pink Vase: Ikea, Gold Geometric Tray, c/o Umbra. Paint, Benjamin Moore “Chantilly Lace”.

If you have any questions about where we sourced any of the items from our renovation, or about anything to do with our bathroom renovation please do not hesitate to comment below, or reach out to me on social media! I know I keep saying we’re so happy, but we really truly are. And I feel so lucky to call this space our very own. Travis and his dad worked so hard on this renovation and it really means the world to me. Thank you to everyone who also helped along the way with suggestions, and responding to my polls on Instagram y’all made this stressful endeavor so much better. I really couldn’t have done it without you, you guys really motivated me on the days when I was exhausted and just so over it. Thank you from the bottom of my heart. Lastly shout out to our renovation partners because we REALLY couldn’t have done it without all of you!! I appreciate your patience and all the time you spent answering all of my questions and concerns. Y’all are the best, and I feel so blessed to have worked with each and every one of you.
Hope you enjoyed this post blog reader. I’m really looking forward to sharing more home renovation/decor content with you in the future as we continue to renovate our condo!
xx
Some of the items in this post have been gifted partners will be marked c/o


5 Comments
LOVE IT!!!!!! XOXOXOX
It’s beautiful Kayla! I love how everything in the space reflects your personality and even has a little touch of home incorporated.
Girllll, is hotel Kayla hotel? I mean the space looks like a spa!!!
So pretty-can’t wait to come use it 😉
LOVE, LOVE, LOVE it!! Congratulations on your beautiful new spaces!! I know all about bathroom renovations!! In our first home we only had one bathroom. Thankful for great friends and the showers at work! When we renovated our condo, we had 2 bathrooms, so much easier! You and Travis did an awesome job!! Much love xox ♥️🍷